I wiped this up in less than an hour, so it should be an easy one. You can follow along exactly or just use this as a guide to do your own thing.

The longest part for me was finding the images, and I’m going to provide them for you now:
Sky: The Sky above us
Girl: If you want to edit the image yourself, grab this one: Sexy Self Shots iPhone+Vanity
If you want to use the one I already edited, grab this one.
We’ll also be using Planet Brushes 2 for the Moon.
Before we begin, please download these or find the images/brushes you would like to use.
Let’s get started!
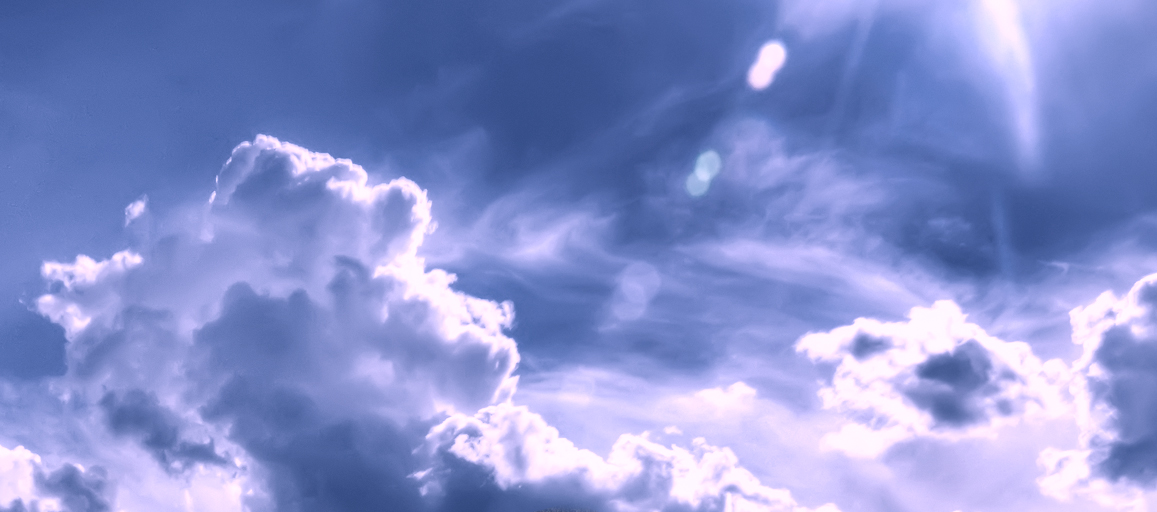
Create an image 1200px wide by 500px tall. We’ll add the sky first. You should have downloaded the original size of the image, as the next smallest is too small for our needs.
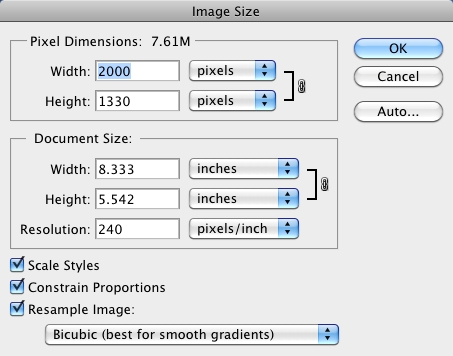
Open this image and go to Image/Image size. Change the settings to look like this:
Go to Select/All and copy the image. Paste it into your new image. Name this layer “Sky.” Use the Move Tool (v) to position it how you like.
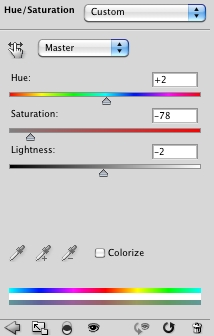
Now we’ll create another layer. Click on the “Sky” layer. Go to Layer/New Adjustment Layer/Hue/Saturation. Make sure the “Use Previous Layer to Create Clipping Mask” is checked and press “OK.” This will make a new layer we will use to alter the sky without changing the original image. This will let us play around without losing the master copy.
Set yours up like so:
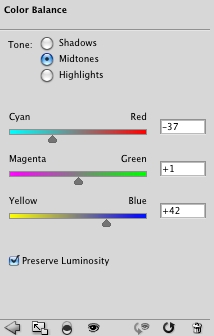
To recreate some color, lets click on the “Sky” layer and create a new layer. We are going to do the same thing again to leave the master copy alone, but we are going to create a Color Balance layer. Go to Layer/New Adjustment Layer/Color Balance. Again, make sure the “Use Previous Layer to Create Clipping Mask” is checked before you press “OK.”
Set up your Color Balance like so:
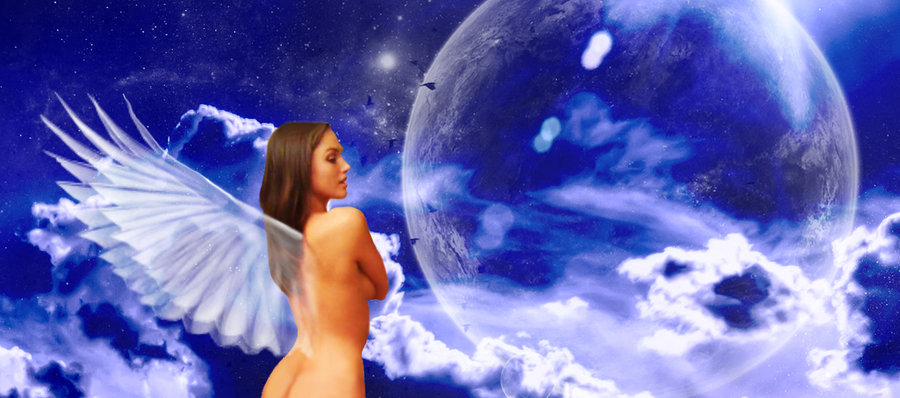
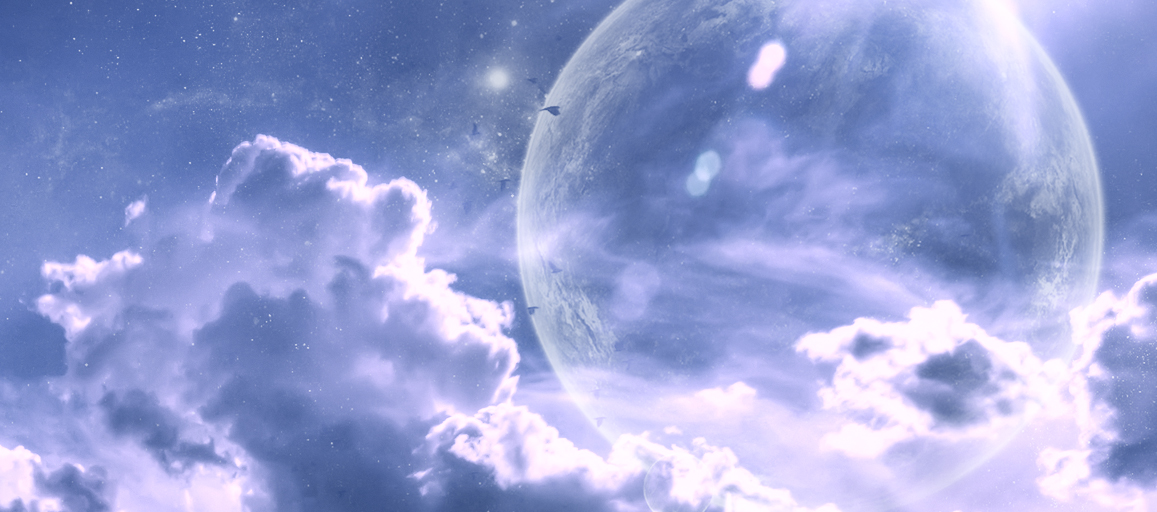
Once you have the one(s) you like, you’ll likely want to delete the unused layers. If you have more than one layer making your Moon and stars, merge them now. Name this layer “Stars.” Change the Opacity to 77%. You’ll want to play with the opacity settings to make sure it’s the way you like it. If you go with the direction exactly as you see them here, your results should look like this:
Now we’ll add our iPhone angel. Open the Sexy Self Shots iPhone+Vanity image (or the image you selected).
There are a few problems with using an image from Flickr. It may be free and legal to use, but these images are not always the best quality. Even when the quality is very good, the image may not be exactly what you are looking for. This is not really a tutorial about removing clothing or fixing images, so here are some basics for anyone wanting to get their feet wet.
An easy way :
There are a few ways to get the image. If you want to do it quick and dirty, use the pen tool to cut out the girl, cutting off the arm with the iPhone (unless you’re making a heavenly iPhone ad). Feather the selection about 1.5px. This should help insure that she doesn’t look choppy.
Looking at the image, the top of the head looks flat. For painters, a more natural method willt be to use the smudge tool to fix this. By “brushing” the hair, one can make a nice, natural looking round head.
Also, angels likely don’t wear purple panties. An easy fix would be to follow the curves of her body smudging above and below the panties (one brush stroke above the area we are eliminating, one below until it done done), but that looks cheap and really only works when cutting most of the area out.
A better way:
Another way, and a better way albeit more time consuming, would be to create a layer above the image and color in the area with the girl white. You can then create a mask to remove the girl from the image.
Create a new image 200X450 and paste her there so to can edit the picture. You can also use the clone tool to remove the underwear, then use the blur and smudge tool to correct the image. Then use existing shadows and highlights to create lines of shadows that belonged on her body.
The hair can still be fixed using the smudge tool method mentioned above.
The simplest way:
Feel free to use this and continue tweaking it if you like, just be sure to give credit back to the original artist per the license agreement. (Just right click or command+click on a Mac to copy or download the image.)

Copy the image and add it as the top layer on our image. Name this layer “Girl.”
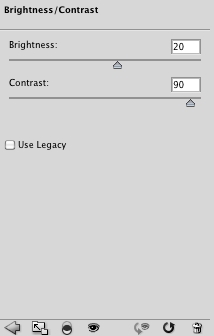
With this layer selected, go to Layer/New Adjustment Layer/Hue/Bright/Contrast. Make sure the “Use Previous Layer to Create Clipping Mask” is checked and press “OK.” Set up your Brightness and Contrast like so:
Place the left wing in the “Wing Left” layer and the right wing in the “Wing Right” layer. Be sure that the foreground color is set to white.
There are many different wings you can use. Here we are going to used the same wing for both, as this worked best for the way she was standing.
After adding the wings, make another layer to draw over the right wing, to give it depth. Using a white brush, add lines wherever you see they are needed to darken them in. With the wings used here, we will want to draw in the top line to make the wings look more a part of the girl.
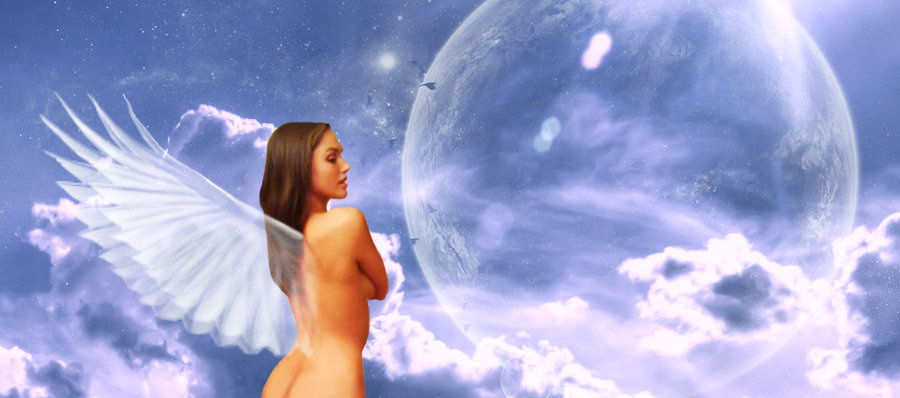
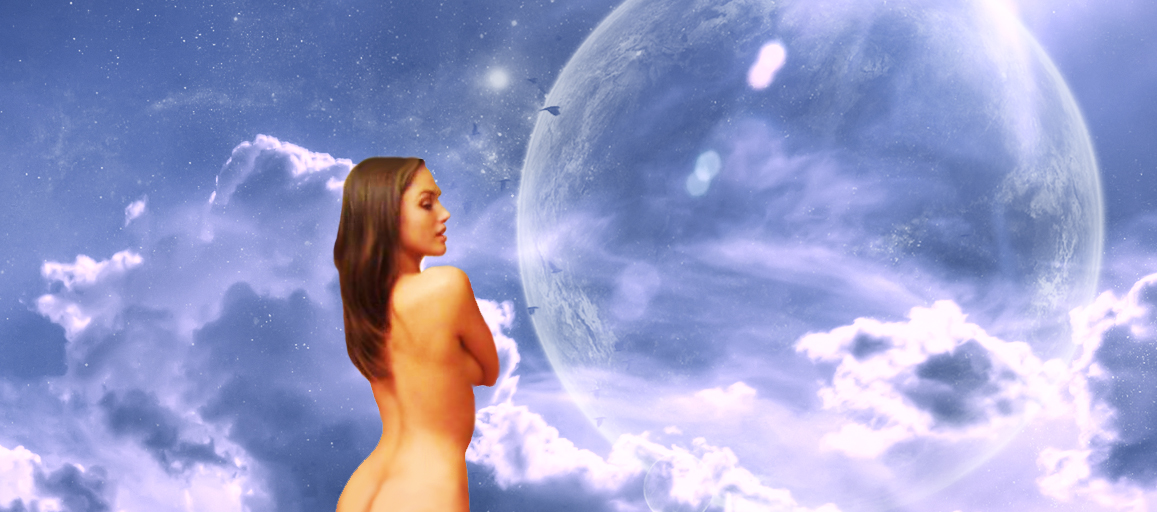
If you used the same images and followed every thing correctly, you image should now look like this: